Top 5 Best OBS Studio Settings
OBS Studio is the leading open-source software for live streaming and video recording. With its extensive features, OBS Studio can seem overwhelming at first. This guide will walk through the essential settings in OBS Studio. Follow along to learn how to set up and customize OBS Studio for your live and recorded productions.
In this article, you’ll learn:
- How to Auto-Configurate OBS Studio.
- How to Set Sources, Display Capture, Game Capture, Windows Capture, etc.
- Setting Up the Audio.
- And Output Settings.
OBS Studio is the king of video recording & broadcasting software. If you don’t have it, click here to complete the installation process.
First, You have to download OBS Studio to continue.
1. Auto-Configuration Wizard:
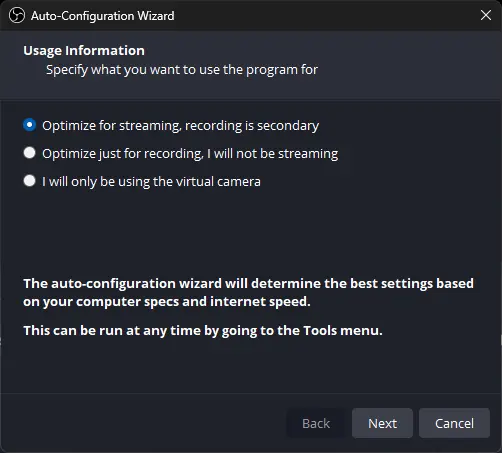
OBS Studio is an advanced software; It comes with an Auto-Configuration Wizard. The Auto-Configuration Wizard optimizes OBS Studio for your needs, whether you’re streaming fast-paced gameplay or recording high-fidelity video. It considers what you want to do in OBS Studio, your computer’s hardware resources, and your network conditions (if you’re streaming).
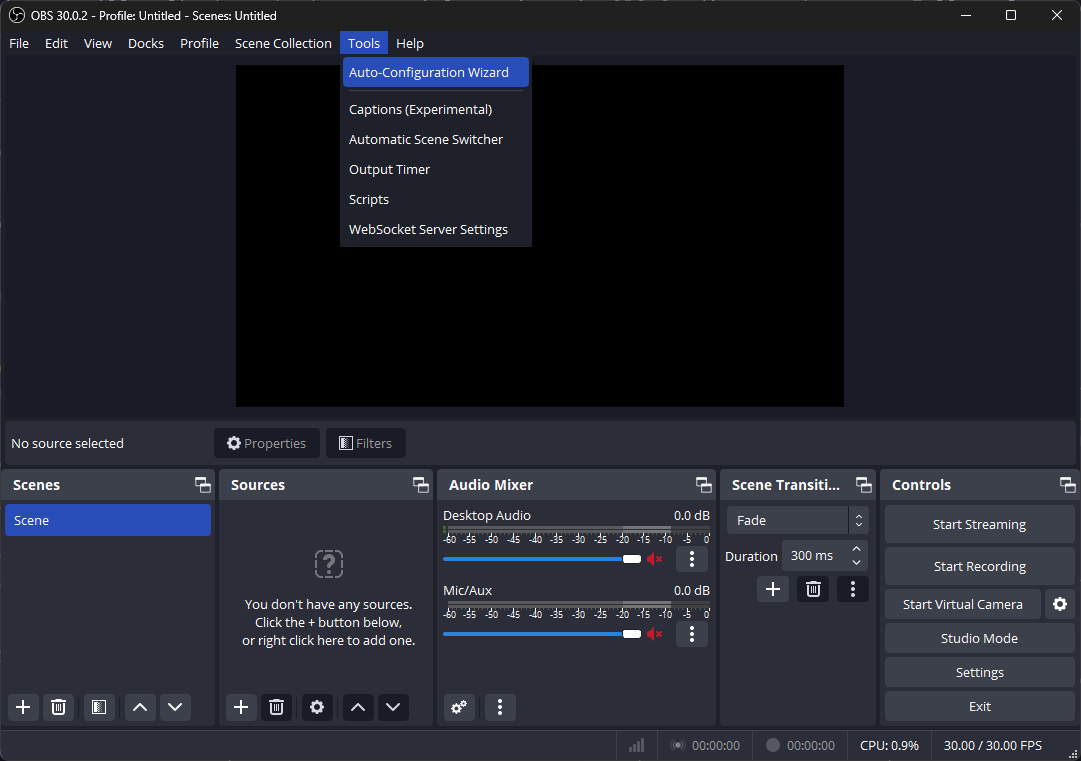
The wizard shows the first time you run OBS Studio 30.0.2. If you wish to use it again, click on the Tools menu → Auto-Configuration Wizard. And follow below given instructions:
Choose “Optimize for streaming, recording is secondary,” “Optimize for recording, I will not be streaming,” or “I will only be using the virtual camera” as per your requirements, & click on next.
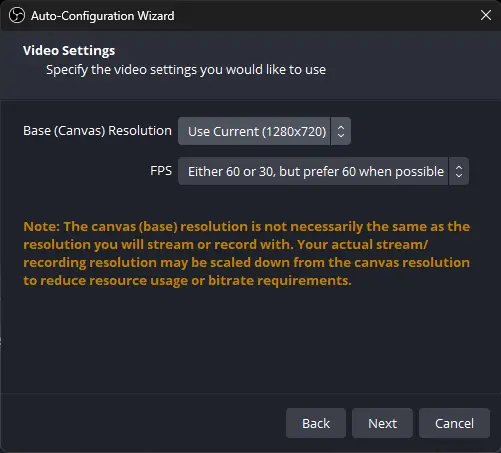
Select “Base (Canvas) resolution” & “FPS” again, as per your requirements; click on next.
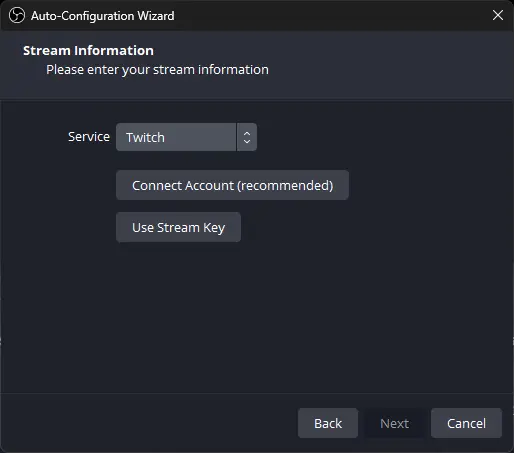
Now, if you’ve selected Optimize for streaming, you’ll get the window to set up your Streaming Service & Stream Key.
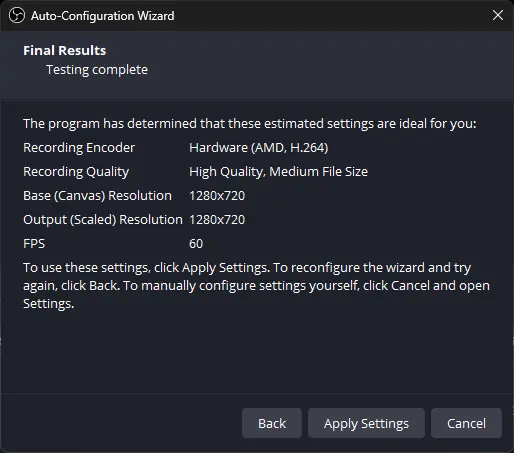
The following window will show you the settings you’ll be applying. Go on and click on “Apply Settings.”
2. Adding & Configuring Sources:
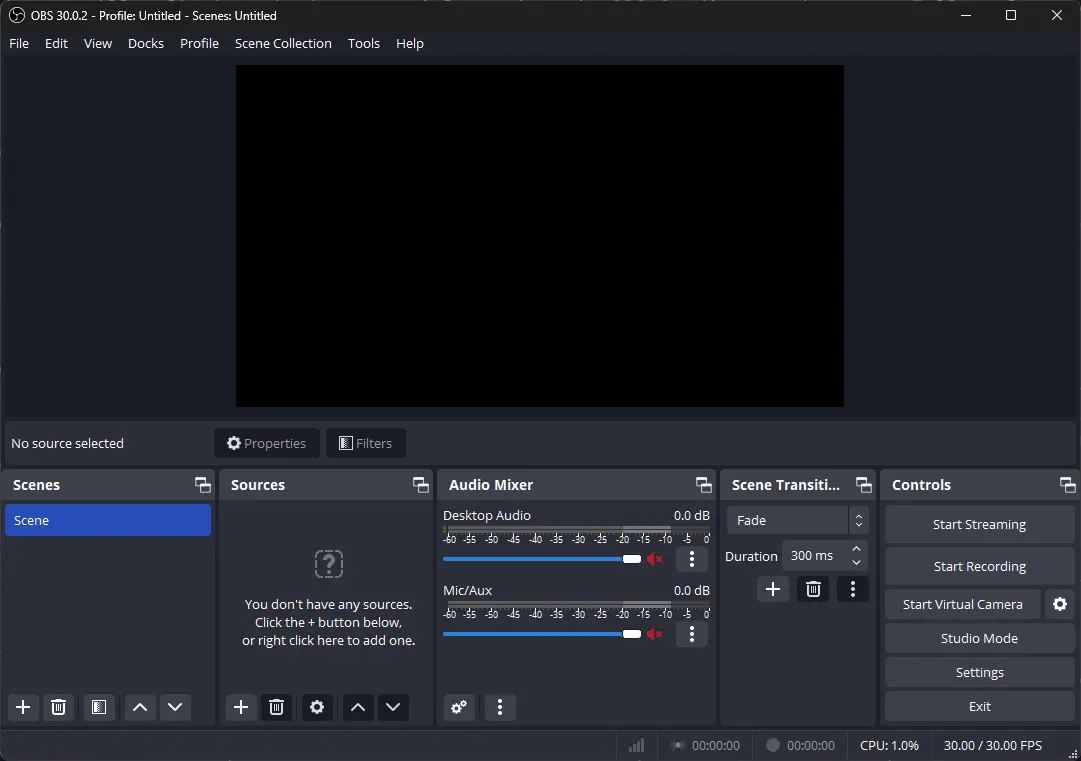
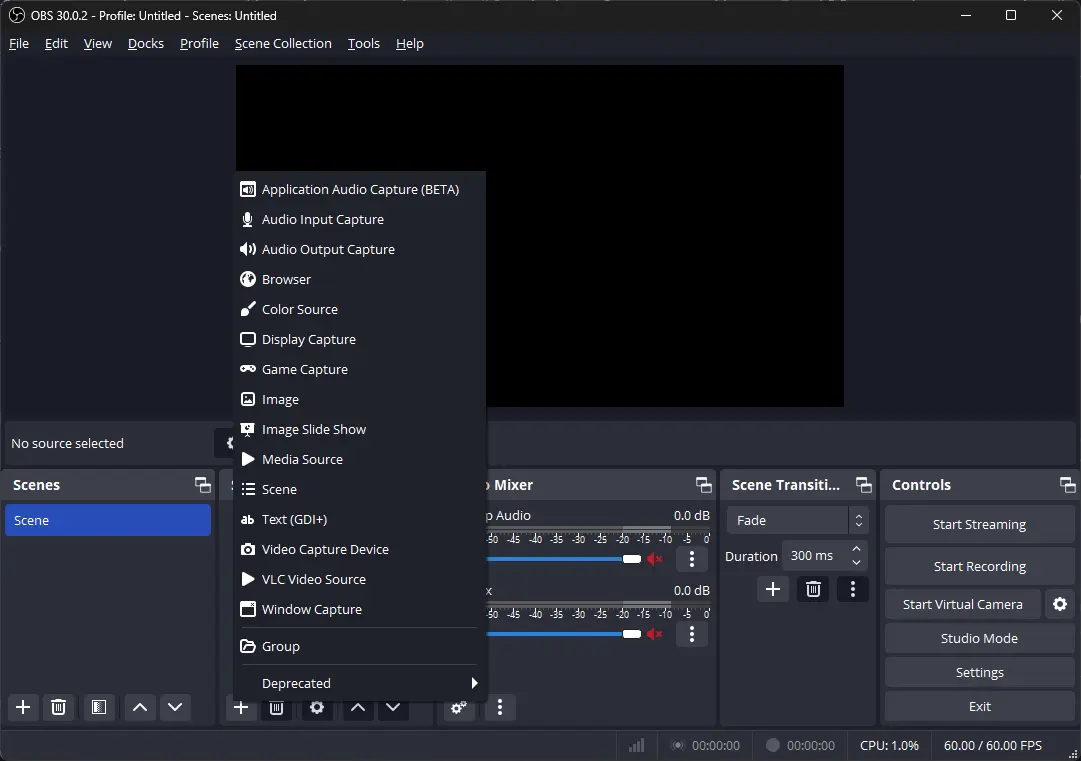
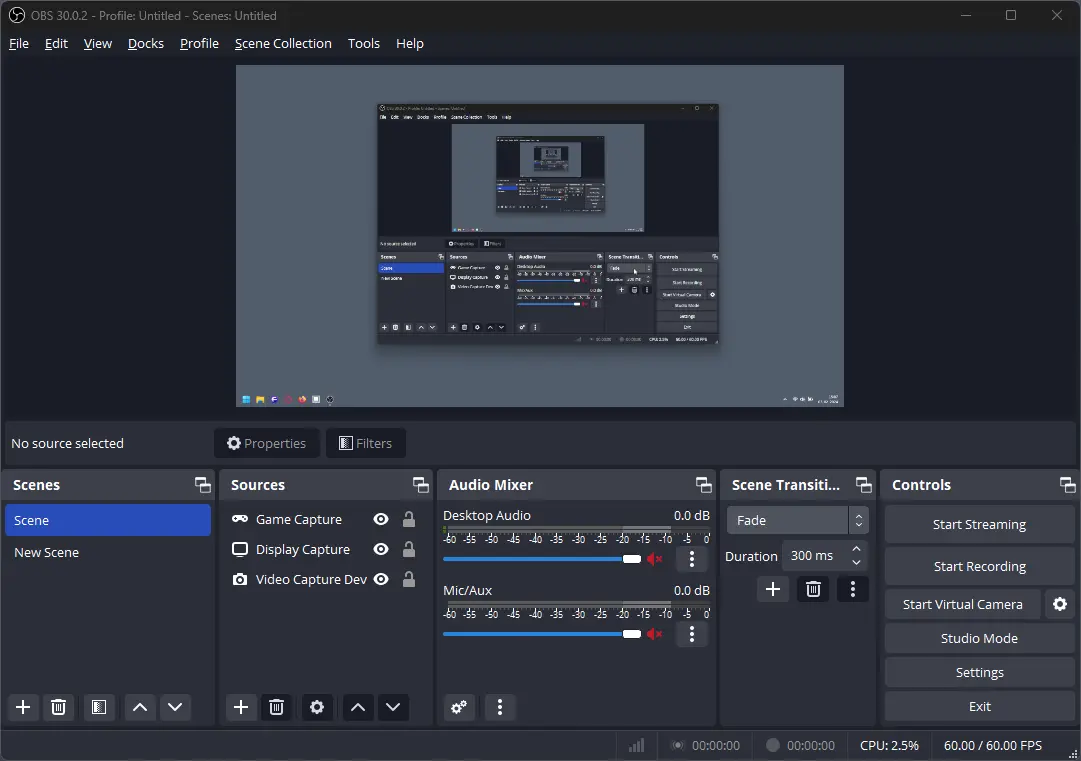
You can add various sources to show images, text, video, webcam, gameplay, desktop, etc. At the bottom of the main window is the Sources Dock. Click on the + symbol to add a source of your choice. Here are a few essential Sources to get you started:
Display Capture Source and Window Capture Source for Windows and Linux, and macOS Screen Capture Source for macOS — capture your desktop or a single window.
-
- Select “Display Capture” after clicking on ‘+.’
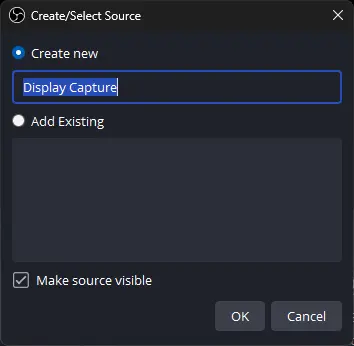
- Give your new Display Capture source a name, or select “Add Existing” to use the previously added Display Capture source.
Download OBS Studio Now!
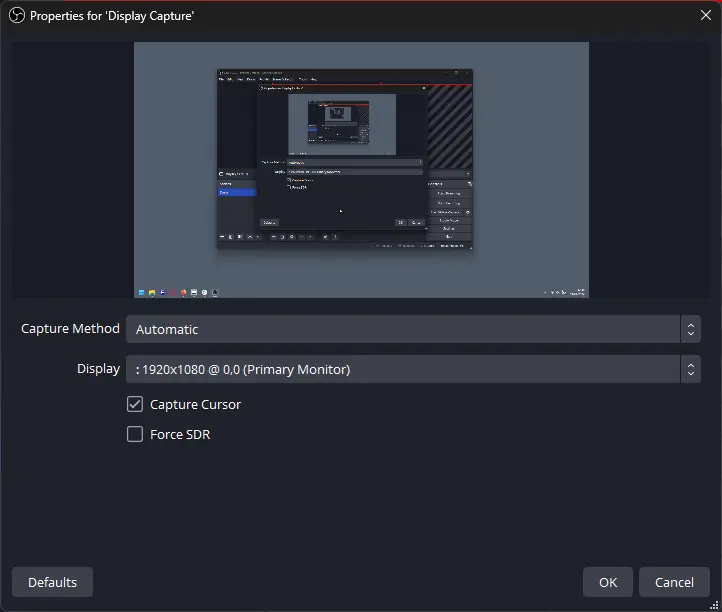
Select your preferred “Capture Mode” & “Display” to capture. You can also disable “Capture Cursor” to hide the cursor in the recording.
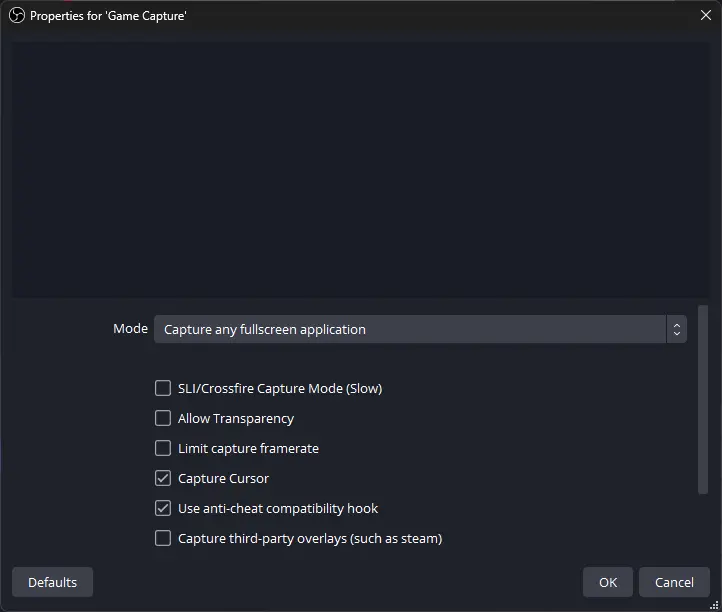
Game Capture to capture 3D games with the highest performance.
- Select “Game Capture” from the Add Sources menu.
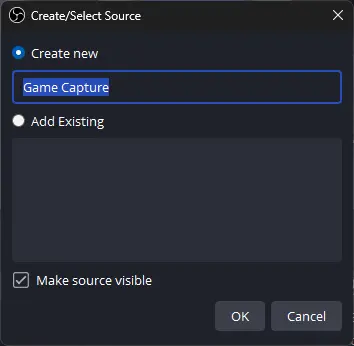
- Give your new Game Capture source a name, or select “Add Existing” to use the previously added Game Capture source.
Select your preferred “Mode”; most games require “Capture any full-screen application.” Try to play around with other options that work for you.
If you’ve selected “Capture specific window,” you can choose your game window by making Windows Title or Name of the Game.
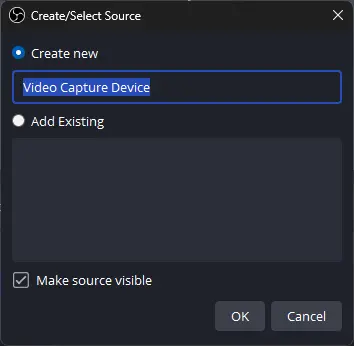
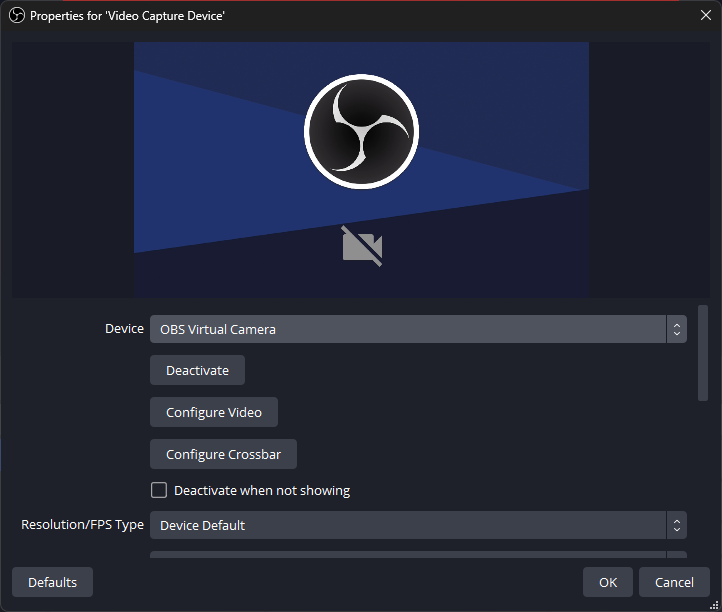
Video Capture Source to capture your webcam and capture cards.
- Select “Video Capture Device” from the Add Sources menu.
- Give your new Video Capture Device a name, or select “Add Existing” to use the previously added Video Capture Device.
Select your webcam in “Device” and play with other options to get the best video quality according to your webcam.
Other Sources: there are many other valuable sources available in OBS Studio. You can similarly add & configure Images, Browser Window, Text, Media Sources, and even existing scenes.
3. Configuring Audio:
By default, OBS Studio is set to capture your desktop audio and Microphone. You can verify this by looking at the volume meters in the Audio Mixer at the bottom of the main OBS Studio window.
If they aren’t moving, or you suspect the wrong device is being captured,
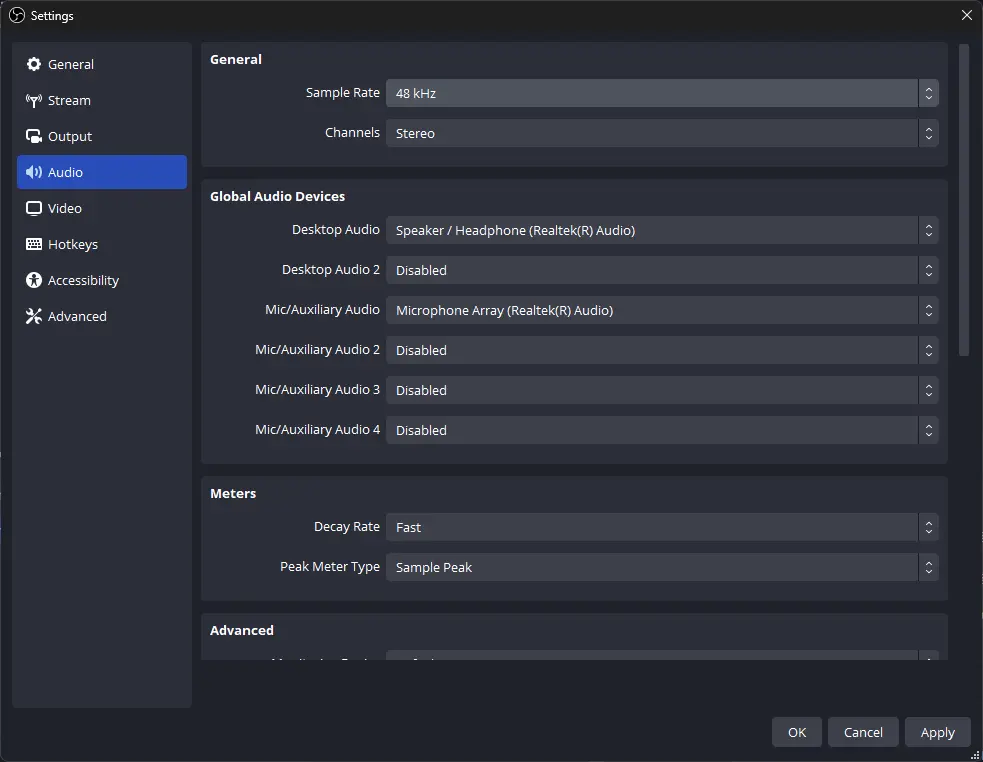
- Go to Settings > Audio.
- For Desktop Audio, select your primary audio output device.
- For the Microphone, select your mic input source.
- Set the Sample Rate to 44.1 or 48 kHz. Higher values improve quality.
- Click Apply to save the devices.
Now, your system audio and Microphone will be captured. The Audio Mixer in OBS Studio lets you fine-tune levels and add filters.
4. Setting Up Output in OBS Studio Settings:
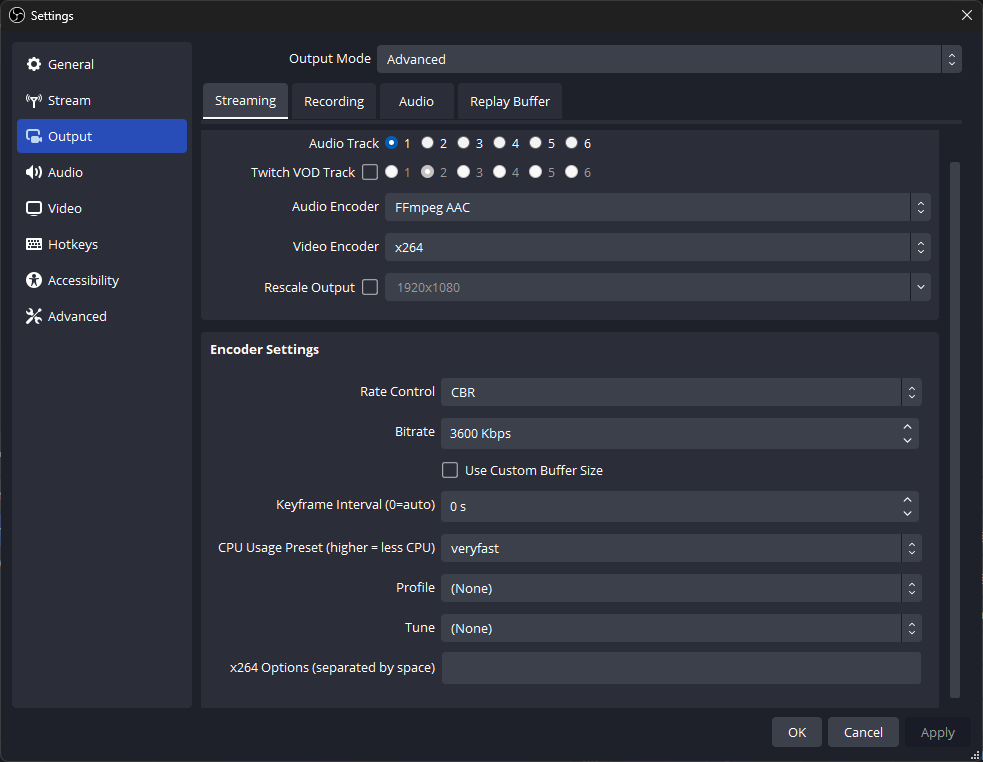
Double-check that all your settings are how you want them in Settings → Output. You can change the output resolution, frame rate, and bitrate.
- In Output Mode, select Simple or Advanced.
- Enter the Server URL and Stream Key provided by your platform.
- Set Video Bitrate based on your upload speed. 2500-4000 Kbps is good.
- Select x264 or NVIDIA NVENC encoder.
Then, click Start Recording or Start Streaming on the Controls Dock. We strongly encourage running a test for a few minutes to ensure no issues rather than just jumping into your first stream or recording.
5. Scenes & Transition
Scenes are collections of your configured sources. You can transition between scenes to switch contexts during the broadcast. All the Video & Audio sources we’ve added for this article were for a default scene called “Scene.”
- You can add multiple scenes by clicking the ‘+’ button in the Scenes window.
- Give a name to your scene, And click on add.
- A new scene will be added with your provided name.
Now you can configure & add sources, as we did with the previous scene. You can create multiple scenes; for example, a videogame streamer might require a Chatting scene, Game scene, “Stream is starting,” and “Stream is paused” scene, etc.
You can transition between scenes by selecting Animation in the “Scene Transition” window and clicking on the scene you want to switch to.
Conclusion:
This covers the essential steps to configure OBS Studio settings based on your streaming and recording needs. With this guide, you should have a solid foundation to produce professional broadcasts with OBS Studio. We hope this helps you get started with OBS Studio settings. If you encounter any problems, please comment below!!
Related Guides
Quick Start Guide
Top 10 OBS Studio Tips and Tricks
