Overview of OBS Studio
This guide assumes that you have a basic understanding of streaming services and streaming terminology. It provides a quick overview of the essential options and features in OBS Studio.
However, if you’re new to streaming and don’t have any prior experience, don’t worry!
This guide can still be highly beneficial. Although it may feel overwhelming initially, take your time to read carefully and absorb the information.
Settings
In general, the majority of settings will be easy to understand without much explanation. While this guide may not cover every single detail, it will provide an overview of the basics and what you can accomplish in each section.
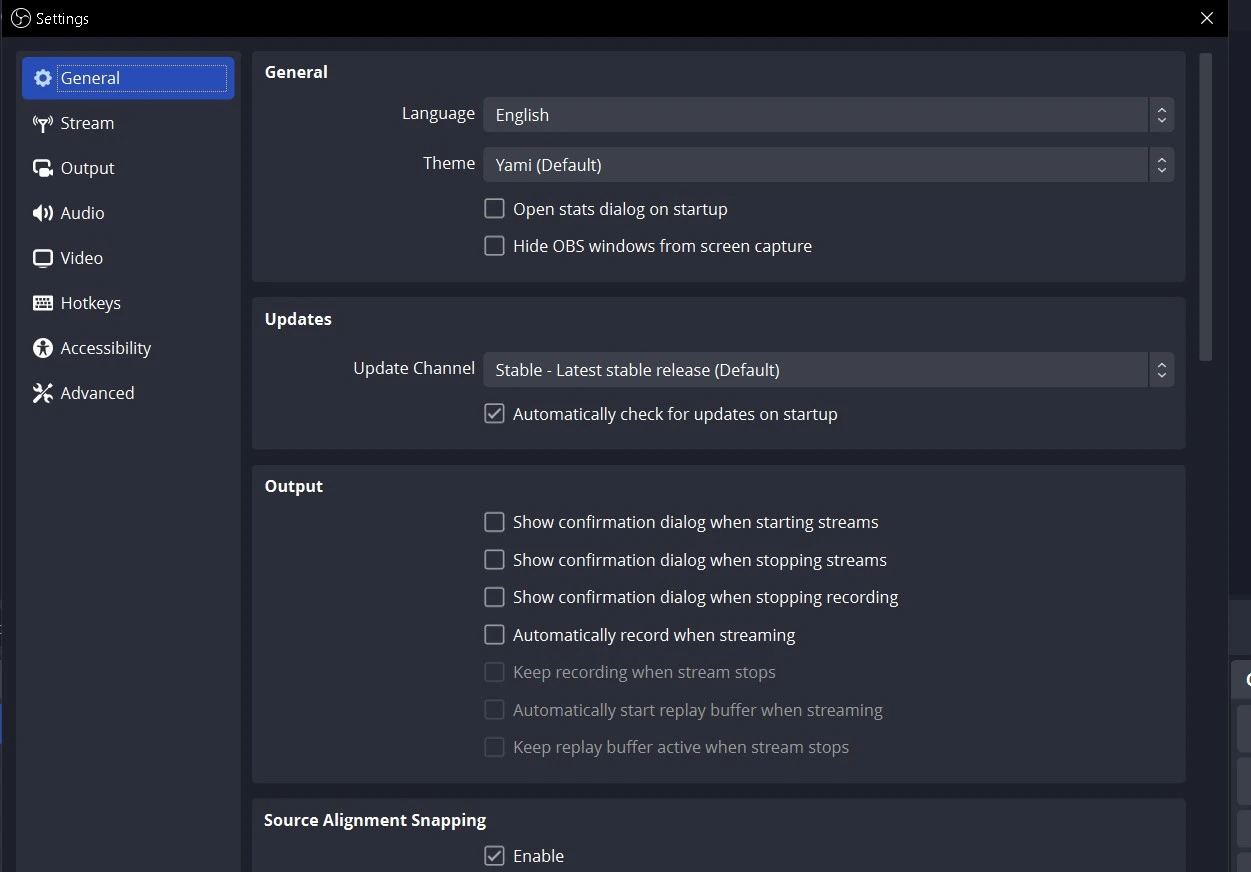
1. General
- Modify theme (light/dark)
- Turn system tray icon on/off (necessary for hiding to tray)
- Display confirmation when starting/stopping streams
- Enable/Disable Source snapping
- Enable/Disable automatic recording during streaming.
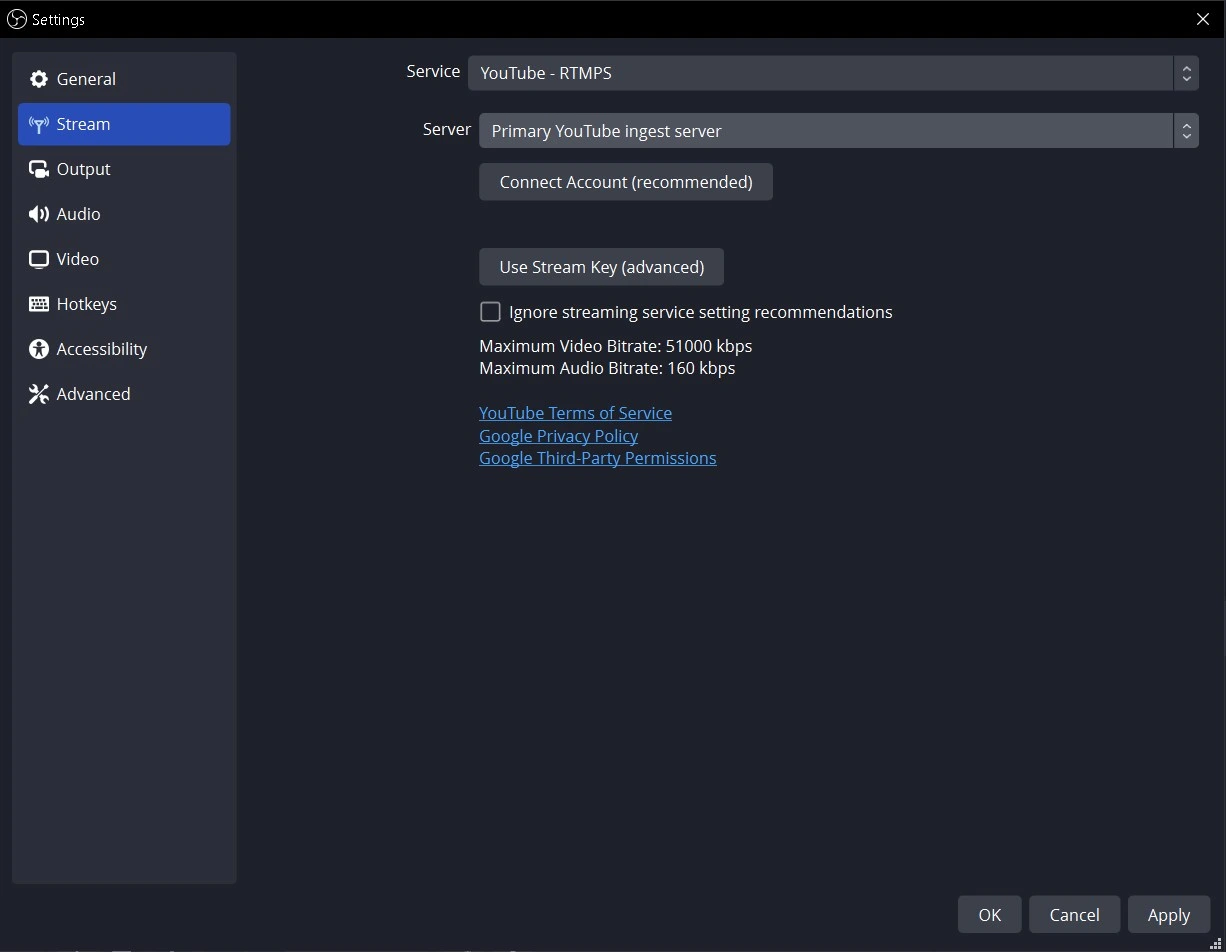
2. Stream
Choose one of the preconfigured Services (enable ‘Show all services’ to view the complete list in the dropdown menu) or set up a Custom Streaming Server. Select the desired server from the list (or enter its URL for Custom Streaming Servers). Enter your Stream Key (typically obtained by clicking the ‘Get Stream Key’ button).
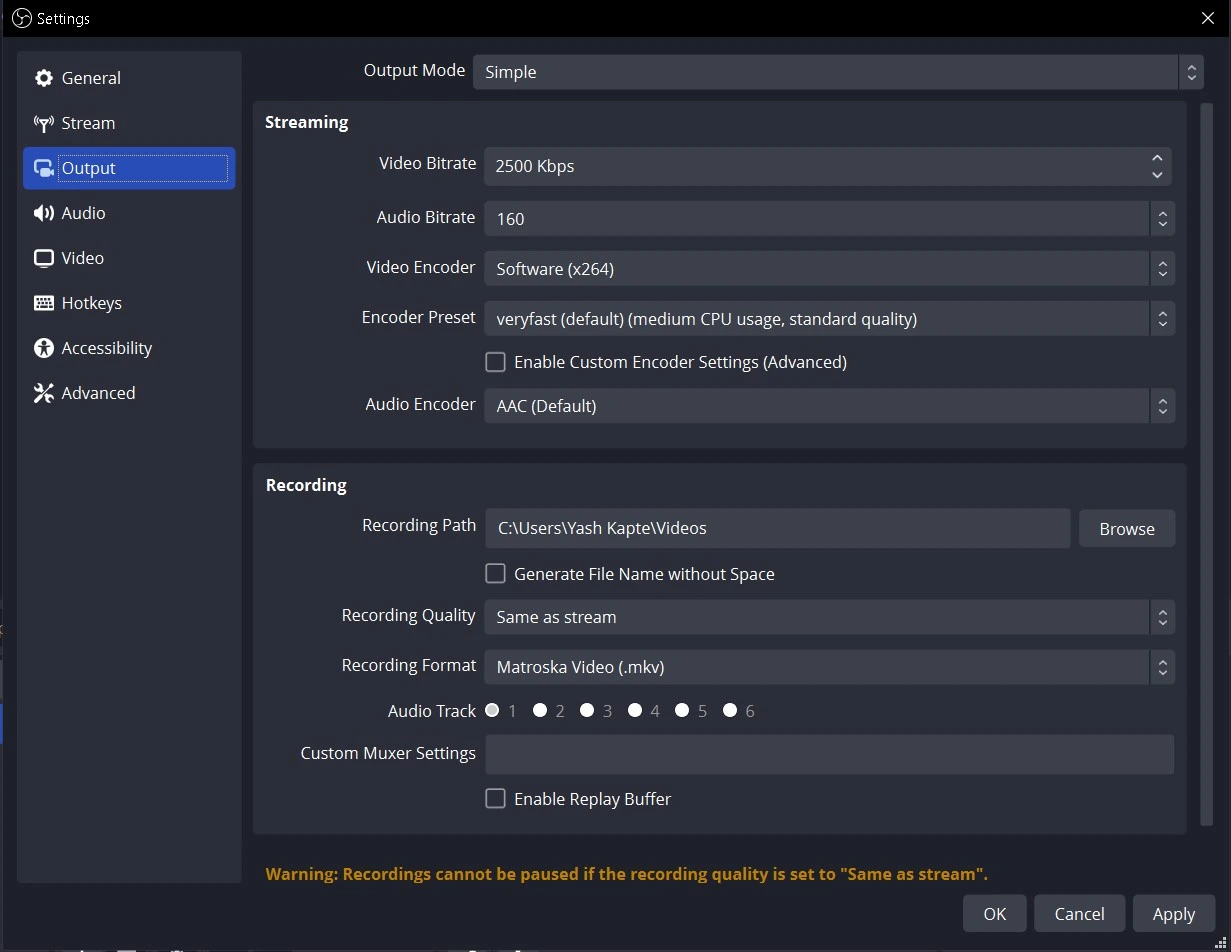
3. Output
Note: This section pertains to the Simple output mode. The Advanced output mode offers additional configurations for independent Stream and Recording settings, but we will not cover those advanced options in this guide (see links provided at the end). In general, it is recommended to stick with the default options unless you have a specific reason to make changes.For Streaming
Configure your Video Bitrate based on your internet upload speed and the restrictions imposed by your chosen streaming platform (e.g., Twitch.tv has a maximum of 6000kbps). Set your Audio Bitrate to around 160kbps for streaming. Adjust it lower if you have a slower upload speed.For Recording
Choose a folder for your recordings by setting the Recording Path. For recording, select a preset for the desired quality (Same as stream, High Quality, Indistinguishable Quality, and Lossless) and consider choosing a different Encoder if available. If your system supports it, select a Hardware Encoder (such as QuickSync, NVENC, or AMD VCE) when using a preset other than “Same as stream”. Please note that the Encoder option will only appear once you select a recording quality other than “Same as stream”. To enable the Replay Buffer, assign a hotkey to save the buffer under the Hotkeys section.4. Audio
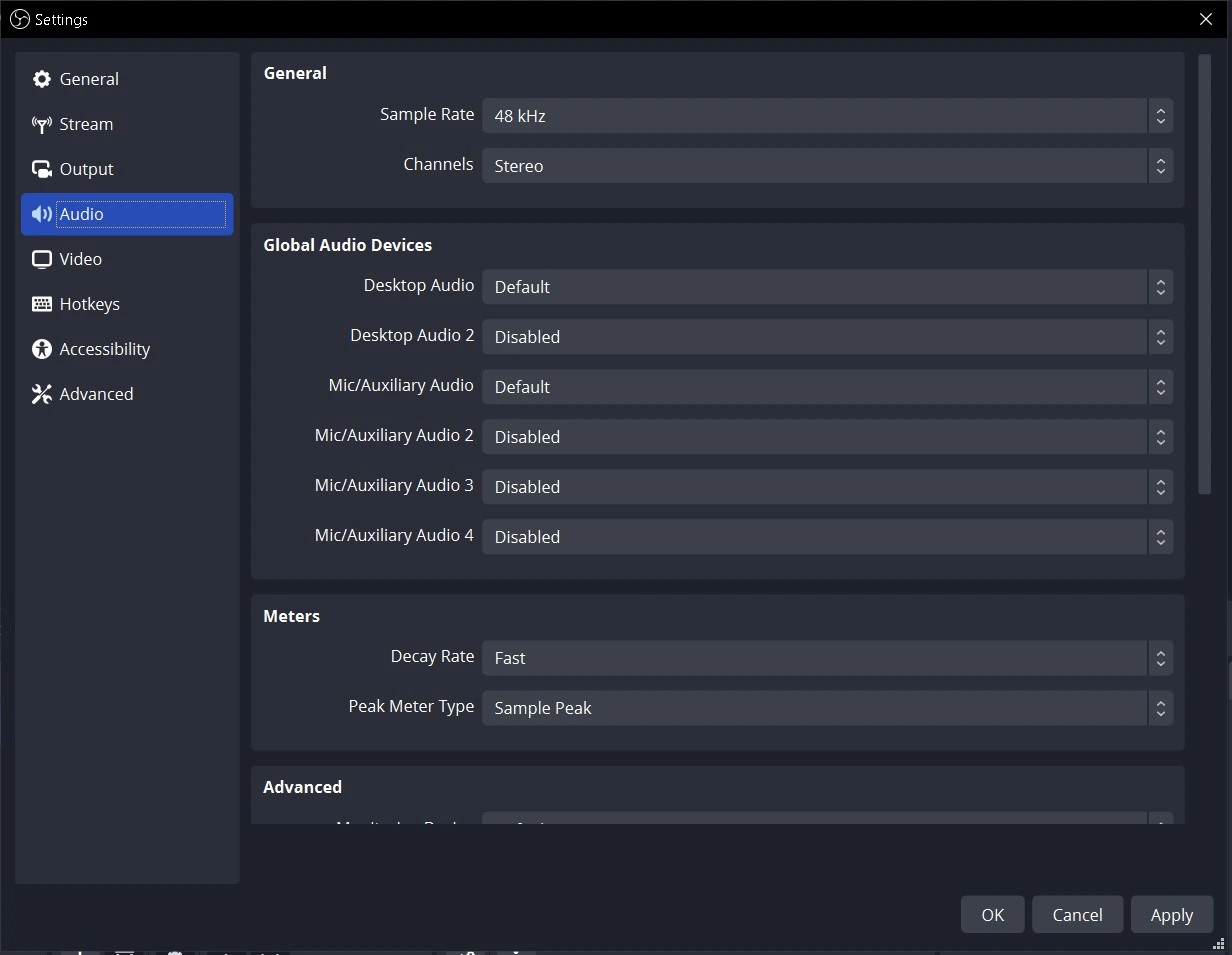
Adjust the Sampling Rate to your preferred audio quality. Choose up to two Desktop Audio Devices for capturing system sounds. Select up to three Microphone/Auxiliary Devices for capturing external audio sources. Enable Push-to-mute or Push-to-talk functionality for each device by assigning keys in the Hotkeys section.
5. Video
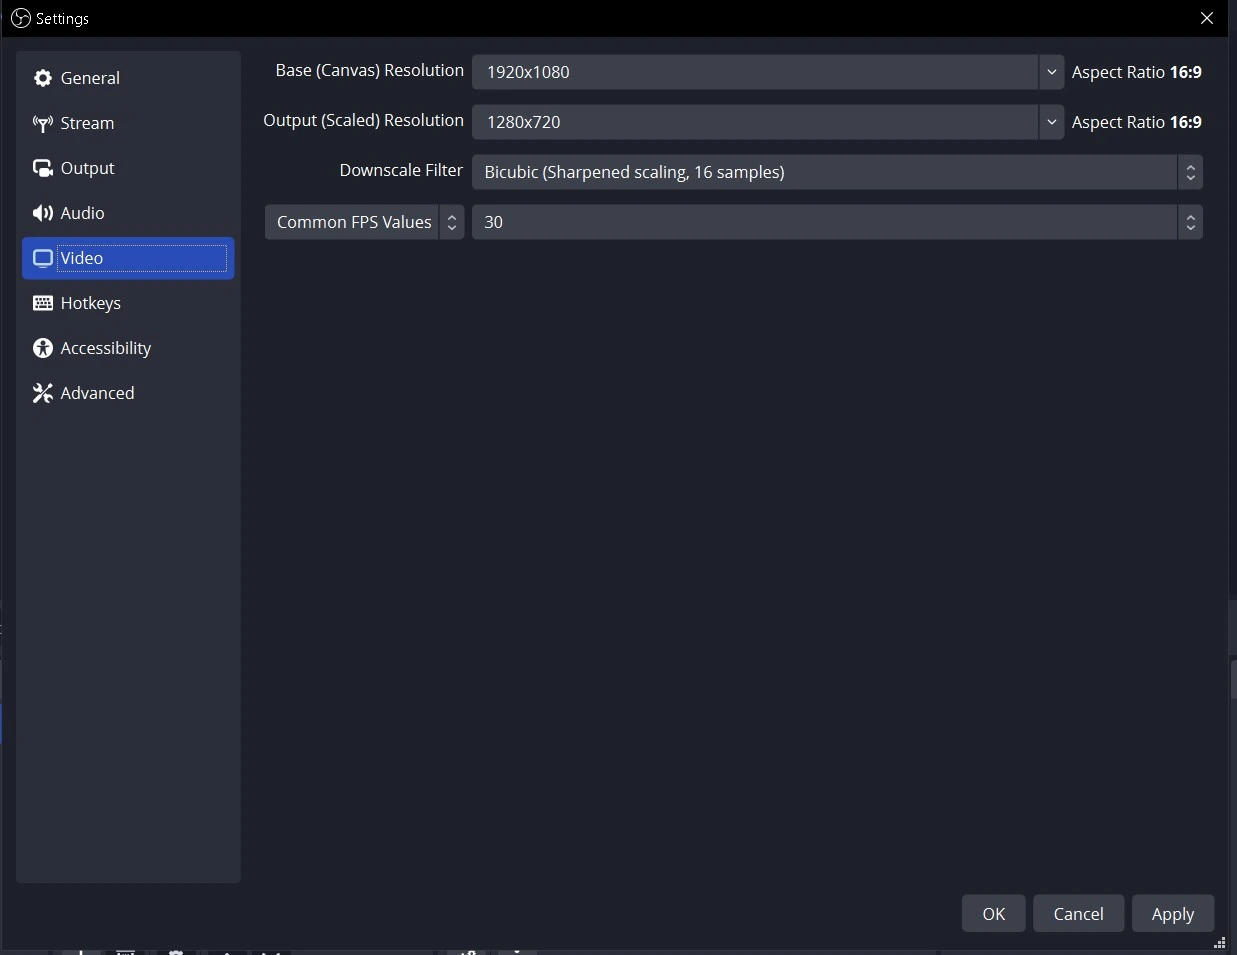
Base (Canvas) Resolution: This refers to the available space to accommodate your sources. Ideally, it should match your monitor’s display resolution or, if you’re playing games, the game resolution. The default setting is your primary monitor.
Output (Scaled) Resolution: This is the resolution at which your stream/recording will be outputted, using the chosen downscale filter. If you have sources in 1080p but wish to stream at 720p, this is where you would make that adjustment.
Common FPS Value: Make sure this matches your desired output frames per second (e.g., 30 or 60). Please note that streaming at 60 fps can be more demanding on your system resources compared to 30 fps. It is recommended to test your system’s capabilities beforehand and ensure sufficient resources are available.
6. Hotkeys
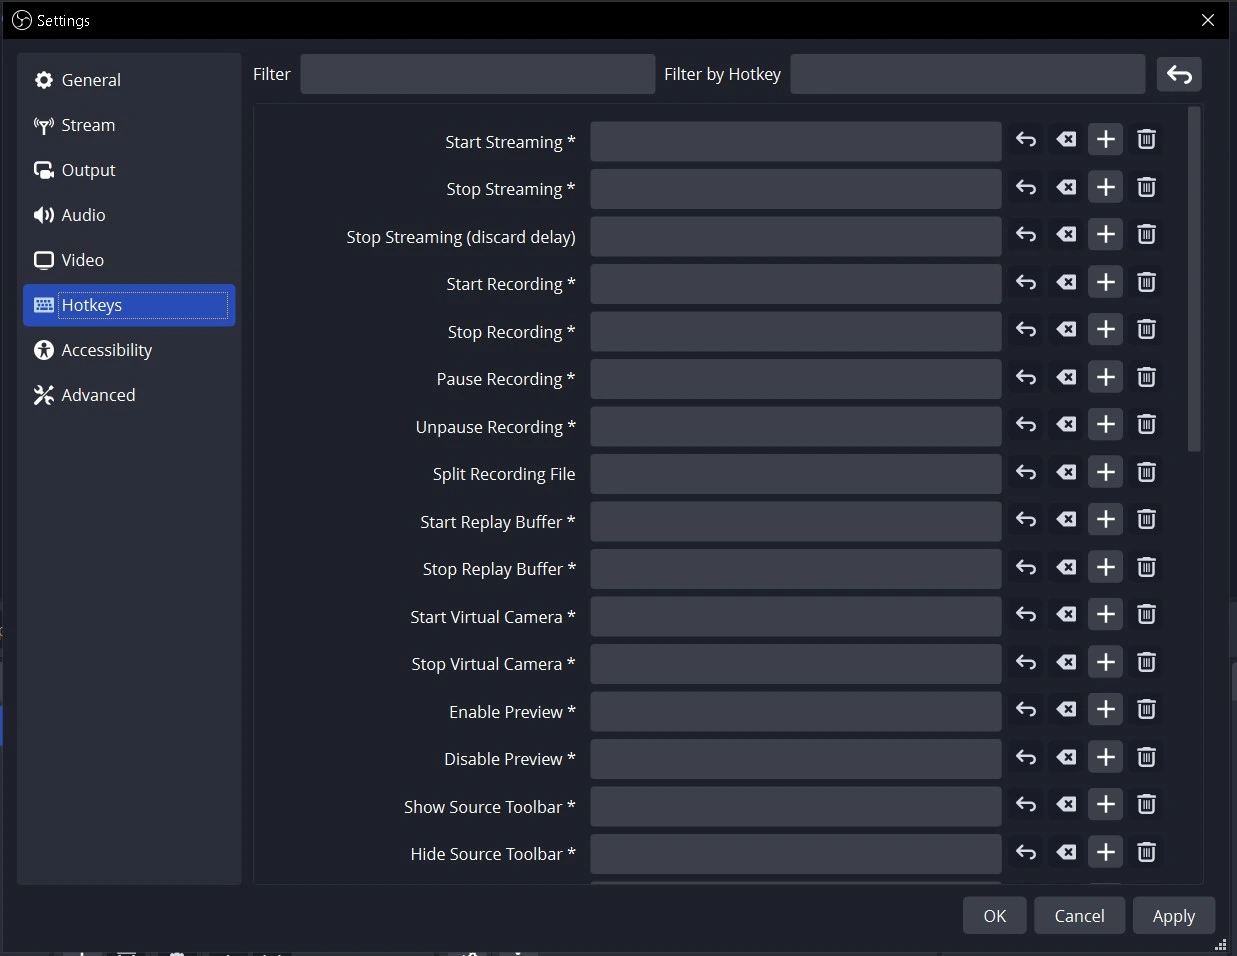
Here you can configure hotkeys that perform various actions. Here are some examples:
- Start/Stop Streaming/Recording
- Hide/Show Sources
- Switch to a specific Scene
- Push-to-talk/Push-to-mute
- Capture the active window for Game Capture
- Start/Stop/Save Replay Buffer
You can assign keyboard keys as hotkeys. For using joysticks as hotkeys on Linux and Windows, you can utilize a program called Antimicro to map joystick keys to common keyboard keys, allowing you to use them within OBS.
7. Advanced
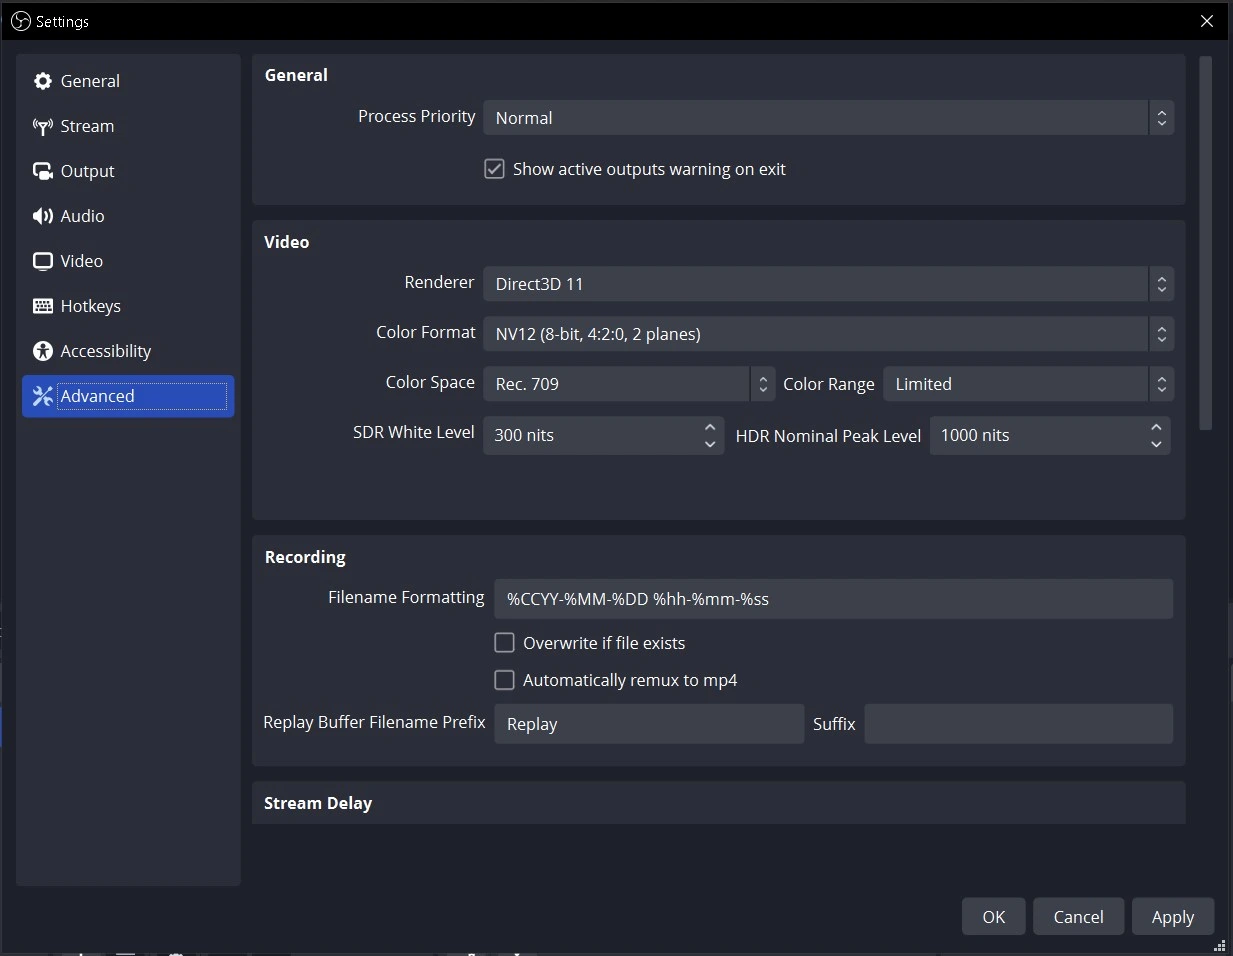
Most of these settings should not be altered unless you have a clear understanding of why you need to make changes. However, there are a few settings that can be helpful for new streamers, such as:
- Adjusting the Filename Formatting (or using folders) to organize your recorded files with a specific structure (e.g.,
%CCYY\%MM\%DD\%hh-%mm-%ss=2016\07\10\12-35-25.flv). - Hover over the field to see a popup explaining the available variables for naming files.
- Enabling Stream Delay for added control.
- Configuring Automatic Reconnect to handle any connection interruptions.
Avoid modifying any other options in the Advanced settings unless you have a thorough understanding of their purpose. Seriously, we mean it. If you have questions, search for answers or seek assistance in the support chat!
Download OBS Studio Now!
Scenes and Sources
Scenes and Sources are the core elements of OBS Studio. They allow you to create your stream layout and add games, webcams, and other devices or media to your output.
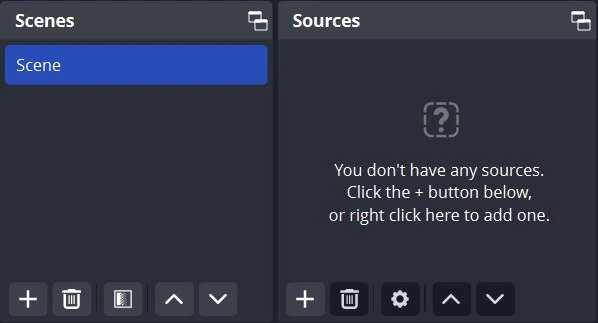
To add a scene, right-click in the box under Scenes (or use the plus button at the bottom) if no scenes are listed yet. You can create multiple scenes and give them distinct names for easy identification, such as Welcome, Desktop, Game, Break, End. Use the arrow buttons to rearrange the order. Keep in mind that all scenes and sources in OBS Studio are global, meaning they cannot share the same name. For example, if you name a source “Game,” you cannot have a scene with the same name.
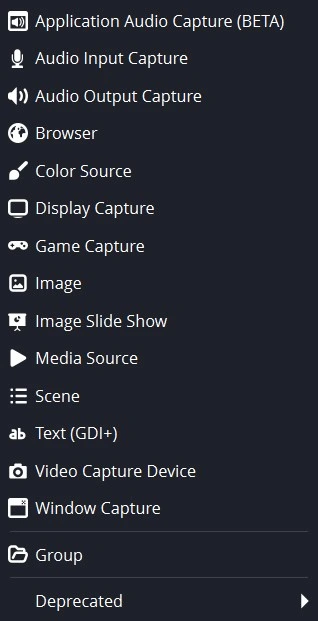
Once you have created a scene, right-click in the Sources box (or use the plus button at the bottom) to add the content you wish to capture. Whether it’s a specific window, a capture card or game, an image, text, or your entire display, OBS Studio offers various source options for you to choose from. Feel free to explore and experiment with them!
You have the flexibility to re-align sources in the preview and change their order by using drag and drop in the list or utilizing the up and down arrow buttons. A source listed above another source will be positioned on top and may obscure what’s underneath. This feature can be handy when you want one source, such as a webcam, to display over your gameplay. Whenever you see an eye icon, you can click on it to show or hide the associated item. This functionality also applies to filters.
Visible:
Hidden:
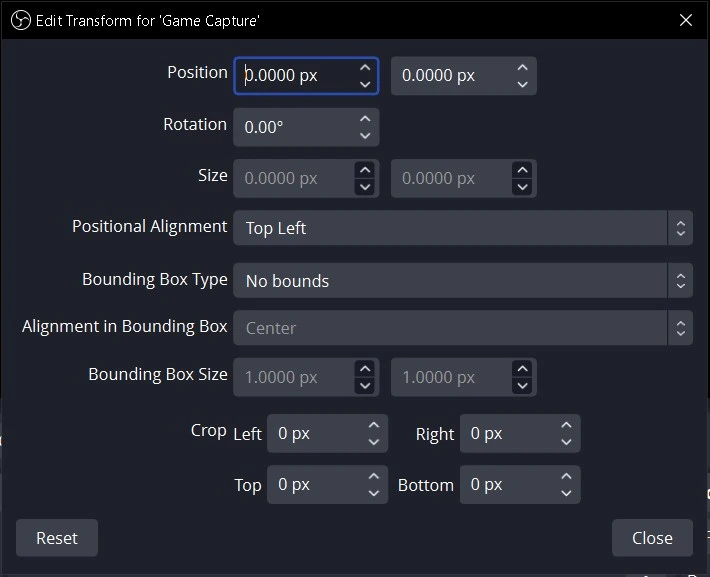
When you select a source in the Sources list, you’ll notice a red bounding box that appears around it. This bounding box allows you to position sources within the preview area and adjust their size. It provides a visual reference to help you precisely arrange and resize your sources according to your preferences.
If you want to crop a source, simply hold down the Alt key and drag the bounding box. As you do so, you’ll notice the edges changing to green, indicating that the source is being cropped. This technique allows you to selectively show only the desired portion of the screen, as demonstrated here.
If you change the Base (Canvas) Resolution in OBS Studio later on, you will need to re-align or resize your sources accordingly. However, changing the Output (Scaled) Resolution does not affect the alignment or size of sources.
To fine-tune the position and size of sources, you can utilize the following hotkeys in the preview:
- Hold CTRL to disable Source/Edge snapping.
- Hold ALT to enable cropping.
- Press CTRL+F to fit the source to the screen.
- Press CTRL+S to stretch the source to fit the screen.
- Press CTRL+D to center the source on the screen.
- Press CTRL+R to reset the source’s size and position.
Additionally, you can right-click on each source in the list to access further options. This is also where you can access filters, which will be discussed in the next section!
Edit Transform menu:
Filters
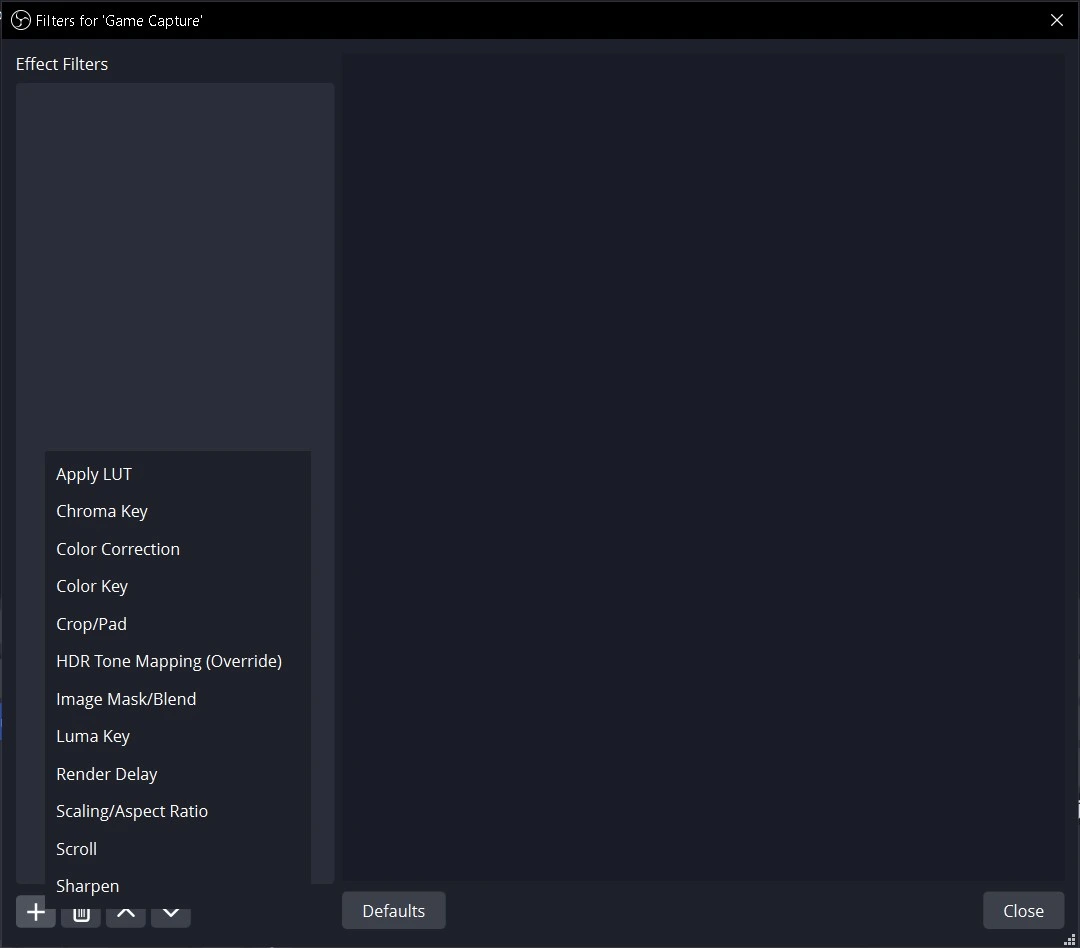
You can enhance your sources, audio devices, and scenes in OBS Studio by adding filters. To add a filter, simply right-click on the desired source or scene in the list, then select ‘Filters’. For audio devices, click on the small cogwheel next to the volume bar in the Audio Mixer and choose ‘Filters’. To enable or disable a filter, click on the eye icon next to it, similar to showing or hiding a source. For a more comprehensive guide on filters and their specific functions, you can refer to the [[Filters Guide]] link.
Here is a list of effect filters you can use:
- Image Mask/Blend
- Crop/Pad
- Color Correction
- Scaling/Aspect Ratio
- Scroll
- Color Key
- Sharpen
- Chroma Key
And here is a list of audio/video filters available:
- Gain
- Video Delay (not available for Window, Display, or Game Capture)
- Noise Suppression
- Noise Gate
Studio Mode
Studio mode in OBS Studio 29.1.3 may initially seem confusing, but let’s clarify its purpose and how it works.
Enabling Studio Mode allows you to make changes to your scenes without your viewers seeing those changes in real time. When you activate Studio Mode by clicking the corresponding button, you’ll see the current Live Scene (visible to viewers) on the right side, while the scene you’re editing appears on the left.
Once you’ve finished editing the scene, you can click on the “Transition” button (or use a Quick Transition/Hotkey if you’ve set one up) to switch the left and right sides, making the edited scene the live scene. If you’re switching between scenes, the previously active scene will be displayed in the edit area on the left. Once you’ve completed all your changes and transitioned to the updated scene, you can deactivate Studio Mode until you need to edit again. It’s important to note that viewers cannot see whether Studio Mode is enabled or not.
Scene Transitions
OBS Studio provides a few default transitions right from the start, including Fade and Cut Transitions. To add more transitions, simply click on the plus button in the Scene Transitions section. Currently, options like Swipe, Slide, Fade to color, and Luma Wipe (with various wipe options) are available. Additional transitions may be introduced in the future.
You can switch between transitions using the drop-down menu and adjust their duration to your liking.
Once you’ve configured a transition, you can also add it as a Quick Transition in Studio Mode. Quick Transitions allow you to specify the duration of the transition. For example, you can add the same Fade transition to your Quick Transitions Menu with durations of 500ms and 1000ms if desired. You can also set up different transitions, such as Swipe left and Swipe right, and add them both as Quick Transitions. This way, you can swipe left from Scene A to switch to Scene B, and then swipe right to return to the newly configured Scene B when you’re finished.
Related Guides
Quick Start Guide
Top 10 OBS Studio Tips and Tricks
